 Proper maintenance is always good when it comes to machine and its accessories. A sewing machine isn’t any different to that rule. When you buy a new machine and start using that it performs really well at the beginning. But after a while, it loses it sharpness and needs proper treatment. That is where cleaning the sewing machine and oiling the parts is very important to keep it running onwards.
Here we will talk about the process part by part. Before you start the process you need to equip yourself with the right kinds of tools and accessories. If you follow the guidelines below, I think you will learn the basic ideas and be able to take care of your machine perfectly. So, let’s start then?
Prepare the Machine First
Before you start the process, read the manual first to get a clear idea about what to do first. Every company has its own directions to clean and oil their products. They provide you with information about when and how to do it. Some say to clean the machine after certain hours. You can clean it after you see any dirt or lint is starting to gather.
If you don’t have any manual with you, you can download it from the web. Just go to the website of your manufacturer and download it from there. Most of them provide it on their site for their customers. You may need to provide some information to show that you are a legitimate owner of their machine. Some machines are self-lubricating. You may still need some maintenance to be taken care of.
Don’t go with a lot of oiling at the beginning. Start slowly. Oil the main areas that are described in the manual. You can place a paper or cloth under the machine so that you can have a good grip. Disassemble the machine parts accordingly. Take the small parts apart from the machine. You need to follow a pattern from cleaning the parts, brushing it out and then oiling where is necessary.
When you are done with your process, you need to pull all the parts back to its original place. So, the whole process starts with turning off the machine and unplugging it. Then remove the extra pieces that may hamper your cleaning process. Like the thread, bobbin case, presser foot, and plates. You also need to remove the stitch plate, the bobbin hook if there is any and also the machine’s needle.
Now we’ll discuss the process of cleaning the machine and oiling it in details.
Cleaning the Machine
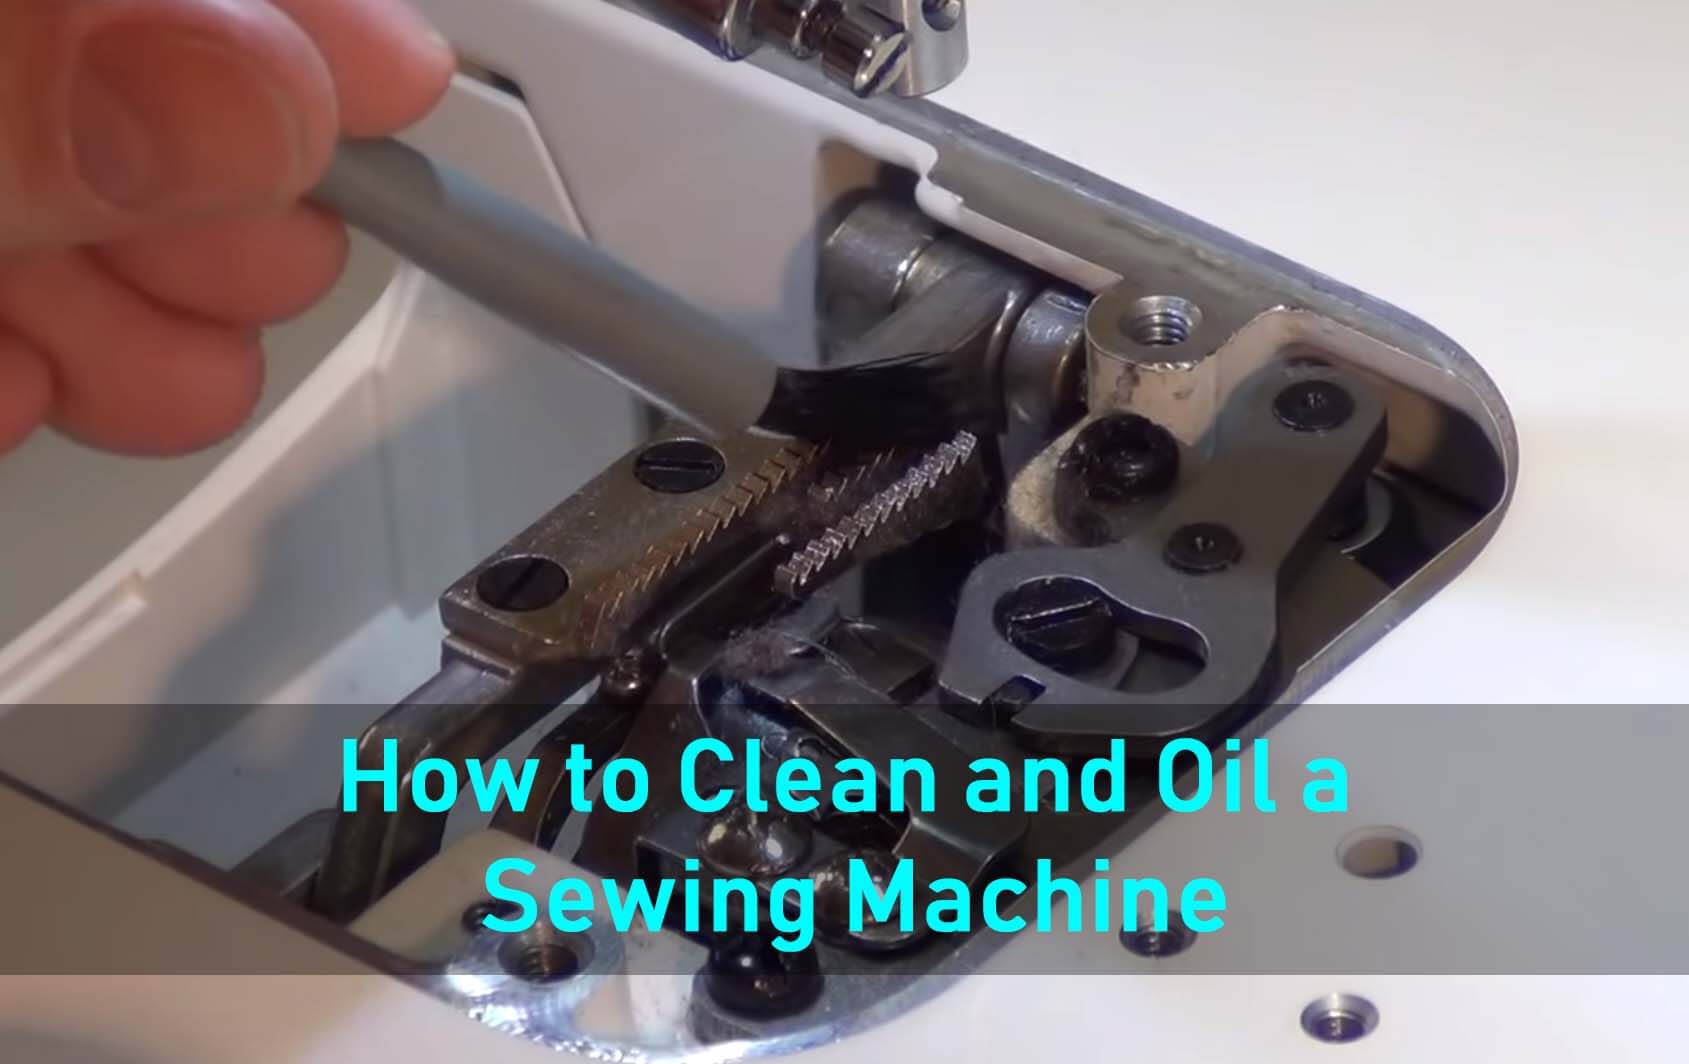
The first part of the process is brushing away the lint from the machine parts with a stiff lint brush. Try to clean the lint that is stuck into the machine parts. You may get a brush from the manufacturer too. Some places are hard to reach through a lint brush. There you can use some tweezers.
It is very important for you to clean the whole machine thoroughly before you put any oil. You should use a soft cloth for removing away any dirt or lint from the bobbin hook. Some may use a pipe cleaner or mascara brushes for this process which is very innovative.
Next, you can use a can of compressed air to clean parts of the machine. It is a technique that needs to be handled with proper care. There is a problem associated with canned air. That is when you are blowing the dirt, it may get deep into the machine. So be careful not to do that.
You should blow the machine from a distance. Try to blow the dirt from an angle so that it removes the lint away from the sewing machine. You can clean the bobbin case and the bobbin case area by this method. Here the bobbin generally loads up.
Also, you should clean the needle plate parts. Before you do that, you should unscrew the needle plate. Then remove it from the machine. If you look into it, you’ll see dirt there. Spray all over the parts with the compressed air. Clean it as instructed by the manual.
Oiling the Machine
Next, you should oil the machine. There are many oil items in the market that you can use. But you can’t use any car oil here. There are sewing specific oils in the market for that. They are clear and can be found in any big shop in general. You may find it also in the dealer shop. They can be found in the sewing or fabric shops too.
The manufacturer gives clear instructions regarding the use of oil. Stick to it. Many often ignore this rule and damage their products. Any household oil or oil-like WD-40 isn’t the proper one. Sewing oil is clear and lighter than regular oil. It has a different consistency than the car oil we use.
When you start putting oils into the machine, start slowly. You only need to put a couple of drops. Few drops of oil into the housing is a good thing for the bobbin case to sit in. The shuttle hook is a place to pour some drops. The hook race and housing is a very important place as the machine will perform better when these areas are smooth.
The outer ring of the bobbin hook is another place to put some oil drops. As it helps to slide along the hook race. After you finish putting oils in the places, you need to wipe away excess oils. Otherwise, it will end up on your threads and fabrics. You can use muslin to wipe the exterior part. A towel that is damp and soapy can be a good choice.
Let the machine sit for a while. The oil will gather for you to wipe. Repeat the process for some time. Before you start sewing, stitch some leftover fabrics to check if any oil is still there.
If you want to buy a quilting sewing machine then visit.
Watch Video: How to Clean and Oil a Sewing Machine Properly
End Words
These are the basic steps that you may follow when you want to clean your machine and oil it. Different company has different steps as per their design of the product. But, basic principles are the same. So, take care of your machine properly and it will take care of your work too. Follow the guideline, enjoy the process while you do it and become a master of it. Happy stitching!


[…] How to Clean and Oil a Sewing Machine […]