Most sewing machines have a bobbin that needs to be threaded in order for the machine to work properly. If you’re not sure how to thread a sewing machine bobbin, don’t worry – it’s actually quite simple! Just follow these easy steps and you’ll be up and running in no time.
- Place the thread on the spindle and pull it through the tension disk
- Guide the thread through the slot in the bobbin case and wrap it around the bobbin a few times
- Pull the thread through to the other side and cut it, leaving a tail of about an inch
- Hold onto both ends of the thread tails and insert the bobbin into its case, making sure that it snaps into place
- Put the bobbin case back into its housing on top or to the side of your sewing machine (depending on your model)
- Turn your sewing machine’s handwheel toward you to raise both needle and presser foot, then release until only one layer of fabric can fit underfoot without being pinched between them
How to Thread a Bobbin on an Old Singer Sewing Machine
If you have an old Singer sewing machine, you may be wondering how to thread a bobbin. It’s actually not that difficult, and once you know how, it’s a snap! Here are the steps:
1. Start by finding the needle plate. This is usually located near the top of the machine and has a small notch cut out of it.
2. Insert the bobbin into this notch, with the winding wheel facing towards you.
3. Hold the end of the thread and wind it around the tension disk a few times, then pull it through the eyelet on the take-up lever.
4. Continue winding until the bobbin is full, then cut off the excess thread.
5. To start sewing, push up on the release lever (located above the needle plate) and lower the presser foot.
Then just guide your fabric under the needle and start stitching!
How Do You Thread a Bottom Bobbin?
Most sewing machines have a bottom bobbin that is inserted from the side or back of the machine. The first step is to locate the area where the bobbin goes. On some machines, there will be a small door that opens to reveal the bobbin compartment.
Once you have found the correct location, pull out any old thread or lint that may be in the way. Next, take your new bobbin and thread it through the tension disc (this looks like a small metal hoop). Then, continue threading the end of the bobbin up through the needle plate hole until it comes out on top.
Finally, hold onto both ends of the thread and gently pull until there are about 6 inches of slack. Cut off any excess thread and you’re ready to start sewing!
How Do You Load a Bobbin?
Most sewing machines will have a bobbin case that needs to be inserted into the machine. Once the bobbin case is in place, you can thread the bobbin. To do this, start by pulling some thread from the spool and holding it under the tension disc.
Then, insert the end of the thread through the hole in the bobbin and pull it until there is about six inches of thread on the bobbin. Next, wind the thread around the bobbin a few times in a clockwise direction. After a few rounds, hold onto the end of the thread and release the tension disc.
Continue winding until there is no more room on the bobbin. Finally, cut off any excess thread and replace the cover on the bobbin case.
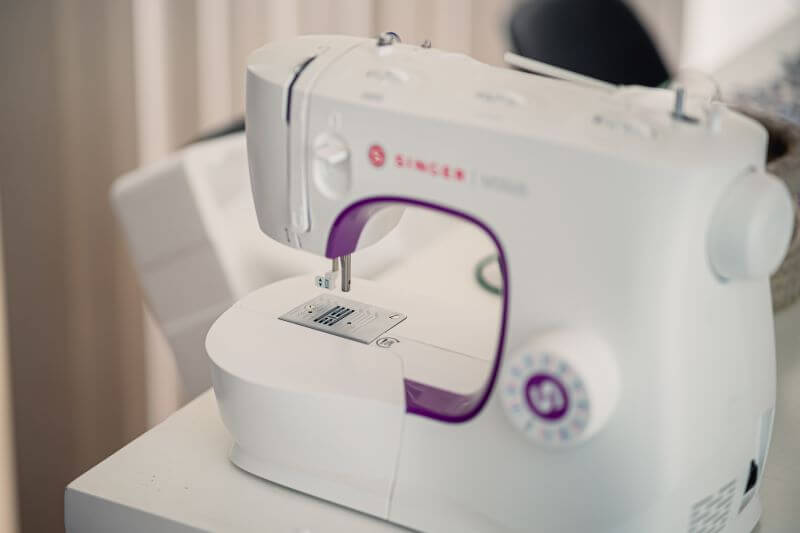
How Do I Thread the Bobbin on a Singer Sewing Machine?
Assuming you’re asking how to load a bobbin onto a Singer sewing machine: First, you’ll need to gather your supplies. In addition to the sewing machine and bobbin, you’ll need a spool of thread.
Make sure the spool is properly seated on the machine – there should be a knob or lever to hold it in place. With the spool in place, take your thread and guide it through the first set of thread guides (these are usually metal loops near the top of the machine). Then, wrap the thread around the bobbin a few times.
Once you have a good amount of tension on the bobbin, insert it into the machine. Most Singer machines will have a special compartment for holding bobbins – this is usually located near the needle. There will also be a small lever or knob that releases tension on the bobbin so you can easily pull it out when needed.
To insert the bobbin, simply drop it into this compartment and pull on the end of the thread until it’s tight. Now that your bobbin is inserted and threaded, you’re ready to start sewing!
How Do You Thread an Old Bobbin on a Sewing Machine?
If you have an old bobbin that you want to use on your sewing machine, there are a few things that you need to do in order to thread it correctly. First, you need to make sure that the bobbin is compatible with your sewing machine. Second, you need to find the correct size needle for your bobbin.
Third, you need to wind the bobbin correctly so that it will work properly on your machine. Lastly, you need to thread the bobbin onto your sewing machine correctly. Compatibility:
First and foremost, you must check whether or not your desired bobbin is compatible with your sewing machine model. There are many different models and types of bobbins available on the market, but not all of them will work with every type of sewing machine. If you’re unsure about compatibility, consult your sewing machine’s manual or do a quick online search for more information.
Size Needle: Once you’ve confirmed that your chosen bobbin is compatible with your sewing machine, locate a needle size that is appropriate for the thickness of the thread that will be used with the bobbin. This information can usually be found on the packaging of both the needles and thread spools. Generally, thicker threads require larger needles while thinner threads can be used with smaller needles.
Winding The Bobbin: It’s important to wind thread onto a bobbing in such as way that doesn’t put too much tension on the thread as it passes through the bobbing eccentricity (the small wheel located above or below the bobbing that keeps it from spinning out of control). If you wind the thread too tightly around the bobbing eccentricity, it can cause problems when trying to stitch with it later on; if you wind it too loosely however, then there might not be tension enough to pull up the bottom layer of fabric as you stitch—causing skipped stitches and poor quality seams overall. There are many ways to bobbin thread onto a bobbing — each method results in a different amount of tension on the final product.
Experiment with different methods and tension until you find one that suits your needs best! Threading The Bobbin Onto The Sewing Machine: After winding the thread onto the bobbin, it’s time to finally thread it through your sewing machine so that you can start using it!
How to Thread the Bobbin on a Singer Sewing Machine
Conclusion
If you’re new to sewing, or even if you’ve been sewing for a while, you may be wondering how to thread a sewing machine bobbin. It’s actually not that difficult, and once you get the hang of it, it’ll be a breeze. Here’s a step-by-step guide on how to do it:
First, find your bobbin case. On most machines, it’s located near the needle. Then, insert your bobbin into the case making sure that the thread is facing counterclockwise.
Once the bobbin is in place, pull out about 6 inches of thread and hold on to it. Now it’s time to put your machine into “bobbin mode.” This is usually done by flipping a switch or turning a knob until the word “bobbin” appears (consult your machine’s manual if you’re unsure).
With the machine in bobbin mode, press down on the foot pedal and allow the needle to lower into its lowest position. Then gently pull on the top thread until you see the bottom thread appear through the hole in the needle plate. Once both threads are coming through evenly, cut off any excess and press down on the foot pedal again.
The needle will now start moving and winding your bobbin with thread! Just keep an eye on it so that your bobbin doesn’t get too full – when it looks like it’s about 3/4 full, stop sewing and release the foot pedal. Then remove your bobbin from the machine (being careful not to let any threads get tangled) and cut off any excess thread before putting your machine back into “sew” mode.
And that’s all there is to it!