 A serger is an outstanding sewing machine used by many sewing loving people. But many have faced an initial problem because of their confusion on how to use a serger sewing machine. Here, we’ll elaborate on this topic and present you with a simple way on how you can use this machine and become an expert.
A serger machine does the work of giving a finished seam to the garments easily. It can be used in multiple needs but the basic job is to secure seams with the overlock stitch. That way it will cover the raw corners of the fabric and will cut the excess part of it. When you are going to use a serger machine, always remember that the most vital part of it is the threading of the machine,
So, let’s know about the techniques of using a serger machine.
How to Use a Serger Sewing Machine Comfortably
There are basically three main parts of using the serger machine. The first part is the threading of the machine. Then you need to adjust the tension of the threads. And, finally, there is the finishing of the seams.
Now, the first and most important part, threading of the serger machine.
Threading the Serger Sewing Machine
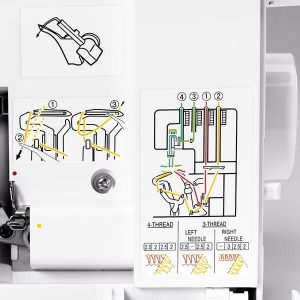
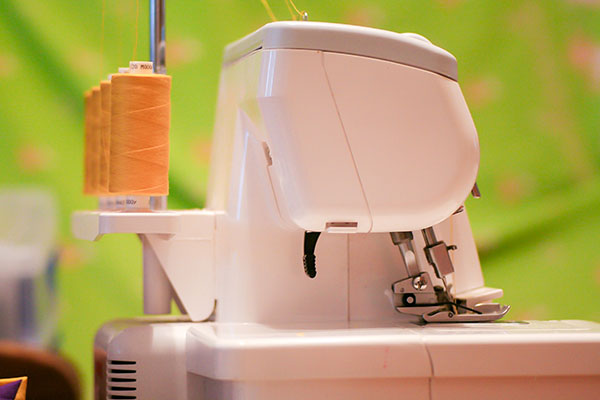
 Before you start the process, first make sure that the machine is turned off. Find the power button and switch the machine off. Next, you should determine the right threading order of the machine. Usually they have four spools of thread. Two of the thread spools are for looping the needles underneath and two are for the needles. Specific models are set in specific order. So, find out the diagram of your machine. Then, you should place a spool of thread on the machine upper looper. In general, they are found on the right side of the machine.
Next, you should thread that looper. You should keep the thread in a manner that it remains just below the needle. To do that, you can remove the faceplate from the front of the machine and pull the thread underneath the plate through a metal loop. Most likely, you will find a color-coded guide in the serger machine that will help you to thread the upper looper.
Now, it is time to thread the lower looper. To do that, you need to place a spool of thread on the second spindle. Next, you need to take the thread over the front part of the machine. You can take the help of tweezers to get the thread easily pass through the tight places of the machine. After that, you should do the threading of the needles. It is similar to the above process. Just set the threads on the respective spindles and bring them over the front part of the serger sewing machine. Finally, put those threads through the needles.
Next, it is time for adjusting the tension.
Adjustment of the Tension
At first, you must turn on the serger machine. Because you must check the tension of the needles if those are okay or not. For that, the machine needs to be turned on. Then, there is the decision about the type of stitch. You must know that a serger can do a lot of things like finishing the raw knit edges, creating a rolled hem, and gathering the fabrics. Here, you need to check the user manual and choose the stitch type you want for the serging operation.
Next, you should concentrate on making the adjustment on each of the spool’s tension dial. As soon as you decide your desired effect on the fabric, you can check the manual and learn the absolute tension of each pool. By knowing that, you can adjust the dial properly. Now, you should run a test stitching first. For that, there is no need to keep a fabric under the machine. Just keep the foot on the pedal and create a looped thread by the machine.
Check the thread that you have just made. You can have an idea by that on how the stitching would look like once you do it on the fabric. Keep one thing in mind that, the interlocking stitches and the loops should be even. Not too even and also not too loose. For loose stitches, make them tighter by using the dials next to the spool. Also, if there is excessive tension, you should make the tension loosen up. Now, find a scrap fabric to test the stitching on your own and practice sometimes until you get the desired accuracy.
Finally, it comes to finishing seams.
Finishing the Seams
At first, lift the presser foot and the needles by lifting the presser foot lever up and by turning the needle dials to the direction where the user is sitting. Next, you should push the fabric where the serging operation will be done under the needles and foot. Before that, take the practice fabric out of the place.
Now, you can lower the presser foot by lowering the lever. Also, you should turn the needle dials towards you so that you can lower the needles. Each serger can finish the seams very nicely and cut them at the same time. Watch the seam allowance to the right side of the needle. Next, take the fabric past the blade likewise. This may be around 1.5 to 2.5 cm for your case. Basically, those things depend on the type of seam allowance you use.
Then, you should start sewing and guiding the fabric under the needles. To do that, you should control the speed nicely by using the foot pedal. Don’t push the fabric too quickly and try to keep the line straight as much as possible. The feet usually helps to get the fabric through. Try to create a tail of stitches that can be tucked under. This will make the process whole if you can follow each step nicely.
End Words
Using a serger sewing machine is not a big deal. It may seem at first. Don’t be very serious or don’t feel that it is beyond your reach. If you can stick to the rules we described, you will be just fine to get the job done. So, start practicing until you reach your desired level. Happy sewing!


